Taping the Wrist
- Carpal Tunnel Syndrome Taping Applications -- Two Taping Applications for Carpal Tunnel Syndrome
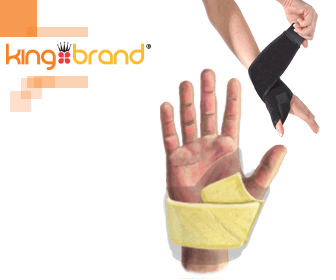
- Taping for De Quervain’s Tenonsynovitis -- How to Apply Kinesiology Tape for De Quervain’s Syndrome
Wrist strain is common in sports like tennis and golf. It is also seen in the workplace due to use of the computer (typing, clicking the mouse). Overuse of the wrist can lead to symptoms of tingling and numbness in the fingers. This is called Carpal Tunnel Syndrome.
Taping your wrist can help with your Carpal Tunnel symptoms, as well as provide compression on the median nerve. Another wrist condition you may want to apply tape for is called De Quervain's Syndrome, which causes pain on the side of the wrist below the thumb. Taping can provide additional support and protection for the soft tissues in the affected area, helping to prevent re-aggravation.
This is important during activities that cause your symptoms to flare up. You should tape your wrist prior to doing any activity that will involve heavy use of your hand and wrist.